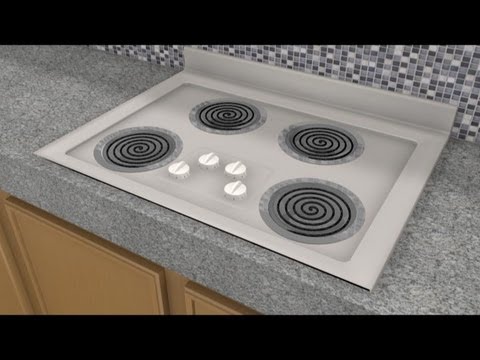
220V electric stove-top AKA (cook-top) has 110V electrical temp controls and 220V heat elements to heat and control the temp while you are cooking. Electric Cook-tops usually have 40-50-amp sized wiring. The breaker size should be sized according to the wire size. Register to ask questions.
Electric cook-top wiring can work with your new stand alone electric range/oven if you are looking to remove the cabinet below the cook-top and install a free-standing range or visa-verse. But remember newer cooking appliances contain digital circuit boards and need the neutral and ground isolated from one another to prevent electrical surges from damaging the circuit boards. A 4-wire romex wire should be run if the existing is the old 3-wire romex. The new 4-wire will make it code compliant and protect the board from surges. If you have 3-wire romex installed for your existing stove top cooking equipment (2-hots and 1-ground), replace it with the correct wiring 4-wire(2-hots,1-neutral,1-ground). This will isolate the neutral from the ground so surges and spikes will not damage the digital circuit board. The additional neutral should be isolated from the ground until it gets back to the main breaker panel. In other words the neutral should NOT connect(bond) to ground at any point until it returns all the way back to the neutral bar in the main electrical panel. Register to ask questions.
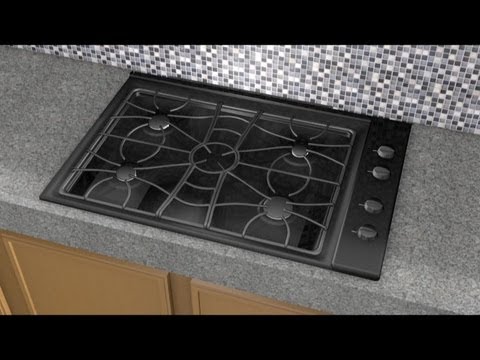
To do a conversion from electric to gas the existing wiring may be used, even if it is 3-wire romex. You can re-identify those existing wires to convert to 110V. Control power is all that is needed, 20-amp 110V circuit. This slight re-configuration is simple but can only be done one way. The existing 3-wire can be remarked and re-connected in a different order at cooktop and breaker panel to serve the control power needed. If this is new install and you have gas, this is much cheaper method than installing a electric range or electric cook-top. Register to ask questions.
Here is some tips on how to wire your new or old electric cook-top:
To run a new circuit for a 220V electric cook-top. If you have run your wire already the end of the wire coming from the electric fuse box should land directly below the hole in counter-top where the new cook-top will be placed. How you get to that point is not discussed here. In the lower cabinet just below the new cut-out mount a 4in. square metal box. It should be screwed into the back of the lower cabinet so you can place the new wire from the fuse box and the new cook-top wires into the new j-box. Both sets of wires should have aluminium flex protecting them back to the wires entrance into the wall-board. The cook-top factory wiring should have flex already around there wires. If the cook-top has a factory j-box then you will not need the j-box mentioned. Any exposed wire must be protected by aluminium flex and supported every 18in-24in when travelling inside cabinet. It should be supported up high with nothing laid on it or anything hanging from the circuit. If you used a j-box the j-box must have a cover and proper wire connections. The black or red(2-hots) connect to the wires marked hot or line-1 and line-2 — most of the time black and red are used for the hots on appliance factory wiring. The white(neutral) connects to the cook-top white. Factories usually always use white for their neutral wires if 110V. The ground or green will connect to any bare or covered stranded wire from the cook-top. Also purchase a pigtail for your green(ground) bond to the cook-top metal with a bonding screw. If there is not a place on the cook-top to bond the pigtail ground(green) then you should grab a drill and self tapping screw. Code wants to see a certified green bonding screw but you may not have one. So just for good measure and to make sure it is not forgotten about, bond it with what you have so it is done. Better to be done in case you get busy. Grounds are VERY important. If you get your hands on a code approved bonding screw replace it. It will be a green colored screw and you may have to tap out the threads to make it work if a hole is not supplied by factory. Make sure you ground your cook-top. I can not say it enough times, Grounds are extremely important.
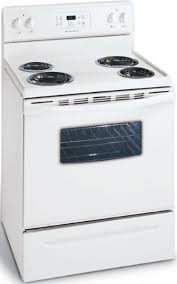
For free-standing electric range, the range plug is pretty easy to connect.
Grab your 50-amp range plug at your local hardware store. If it is surface mounted or flush mounted it does not matter. Just land the correct colored wires to the marked and/or matching colored screws on your new range plug. The red and black are your hots. Hope some of these tips help. Register to ask any question.
We use cookies to ensure that we give you the best experience on our website. If you continue to use this site we will assume that you are happy with it.OkNoPrivacy policy
You can revoke your consent any time using the Revoke consent button.Revoke consent